Subscribe to our newsletter
Be the first to know about the latest solutions
Digital Factory
T13/ Power Automate - Tutorial: Create a scheduled cloud flow from a SharePoint list
T13/ Power Automate - Tutorial: Create a scheduled cloud flow from a SharePoint list
Couldn't load pickup availability
Paid Tutorial: An access link will be sent to you after purchase.
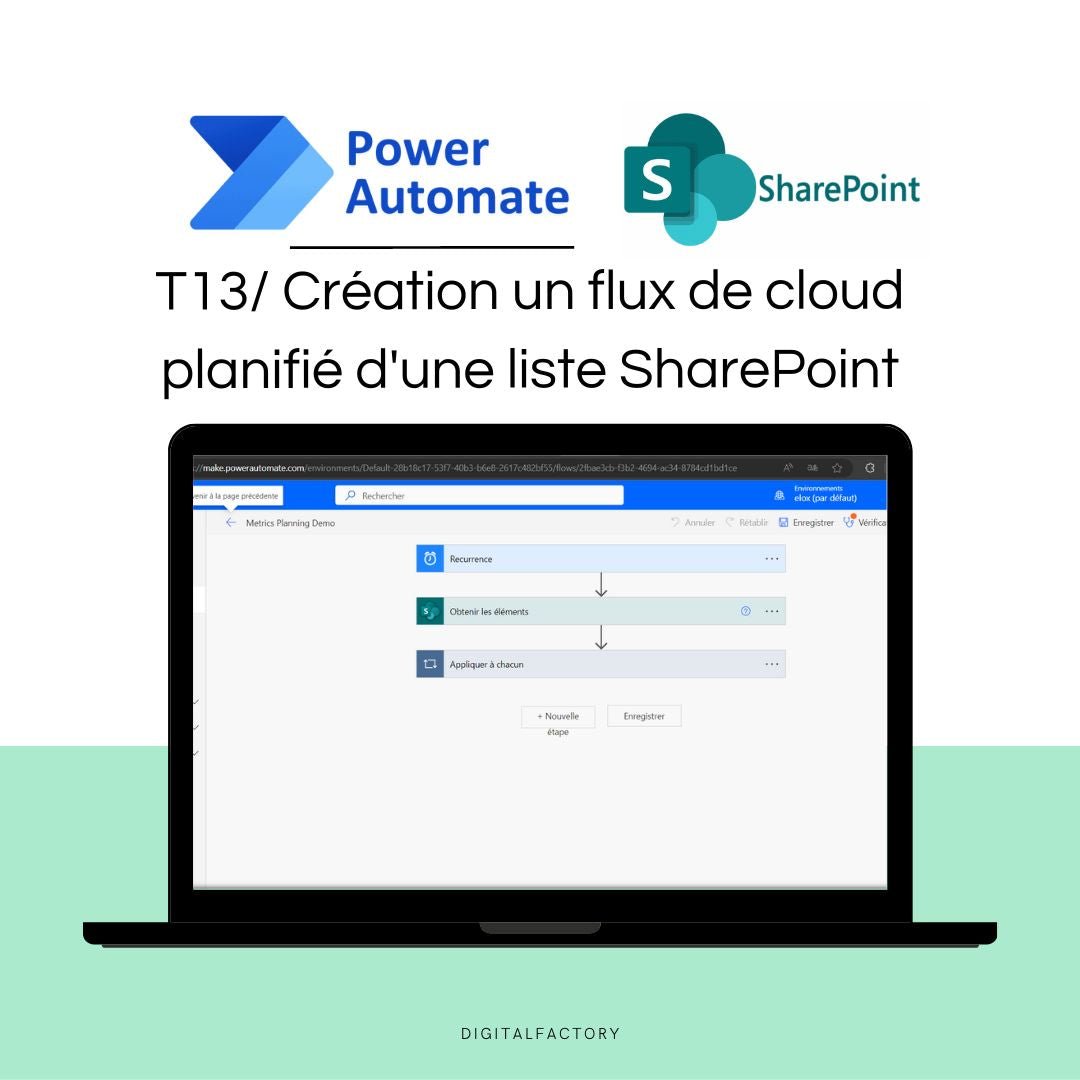
In this Microsoft Power Automate tutorial, you will learn how to create a scheduled cloud flow from a SharePoint list connected to a Planning Ms project.
👉 Discover the full training program
To get started, create a new SharePoint list. To do this, go to the SharePoint home page and click on Create List . You can choose from an existing list, just like in our case, we will open an existing Excel file.
In our Excel file, we have the project schedule data. We will create a table from this data . In the Insert tab, click Table . Make sure that the option 'My table has headers' is checked, and then click OK . Now, go back to SharePoint and refresh the Excel file . And there you have it, we have created a list with the project columns.
Now it's time to create our flow on Power Automate to capture the schedule data every day. In the Power Automate app, click Create, then Scheduled Cloud Flows . Set the timing for the flow to run, for example, every day in the evening.
Add a second step to get the SharePoint list items from the current schedule. Select the site and list . If the list is not displayed in the available options, you can add a custom value .
Next, create a third step, find the action. Create a SharePoint item . Add the site and select the list we just created. Then map the corresponding fields. To summarize this flow, every night it will capture all the data via the 'Get Items' action and copy all the items to the new list. Save the flow and run it to test it.
Thanks for following this tutorial. See you next time.
Share
- Access your product in 30 seconds: steps 👇
- Title
- Title


FAQs
How will I receive links to the videos?
Links to the videos will be sent to the email address you used to place your order. Be sure to check your inbox and spam folder.
Will I have unlimited access to videos?
Yes, you will have unlimited access to videos for life. You can watch them as many times as necessary to fully assimilate the content.
Are the videos downloadable?
No, the videos are not downloadable. They are only accessible online via the links provided after ordering.
Can I share video links with others?
No, video links are strictly personal and should not be shared. They are intended solely for the use of the buyer.
Is there support available if I have questions about the content of the videos?
Yes, if you have any questions about the content of the videos, you can contact us at [hello@digitalfactory.store]. We would be delighted to help you.
Subscription offers
Subscription - Access to Excel, Power BI and Ms project tutorials and models
Corporate Pack
- No renewal constraints
- Full access to all tutorials:
- MS Project: Planning, Resources
- Power BI: Data Preparation, Dashboards
- Power Automate: Workflow Automation
- Full access to all models:
- Project management, Operational efficiency, Lean,...
- Premium Dashboards Included
- Unlimited downloads
- Personal space included
- 30 minute support included
Monthly Subscription
- Full access to all tutorials:
- MS Project: Planning, Resources
- Power BI: Data Preparation, Dashboards
- Power Automate: Workflow Automation
- Full access to all models:
- Project management, Operational efficiency, Lean,...
- Premium Dashboards Included
- Unlimited downloads
- Personal space included
- 30 minute support included
Annual Subscription
- All the advantages of the monthly
- Save 36% compared to monthly
- Priority consultation with an expert
- Updates and new models every week
Recommendations
-
J8/ Model — Calculation and monitoring of OEE Excel 2025 ...
4.94 / 5.0
(32) 32 total reviews
Regular price From €159,00Regular priceUnit price / per€279,00Sale price From €159,00Sale -
J9/ Budget and Deliverables Tracking Template for Business
3.67 / 5.0
(6) 6 total reviews
Regular price From €59,00Regular priceUnit price / per€249,00Sale price From €59,00Sale -
J28/ Power Bi Project Management Template to download
4.0 / 5.0
(8) 8 total reviews
Regular price From €0,00Regular priceUnit price / per -
J27/ MS Project Gantt Planning Template to download
Regular price From €69,00Regular priceUnit price / per -
J10/ Project Management Excel Model for project managers
4.82 / 5.0
(11) 11 total reviews
Regular price From €49,00Regular priceUnit price / per€219,00Sale price From €49,00Sale -
J30/ Power BI Model - Risk Analysis (Amdec)
Regular price From €0,00Regular priceUnit price / per -
J7/ Model — Example FMEA Excel Process - Dashboard - RPN ...
4.44 / 5.0
(9) 9 total reviews
Regular price From €59,00Regular priceUnit price / per -
C1/ ebook: White Paper - From vision to action, the futur...
5.0 / 5.0
(4) 4 total reviews
Regular price €39,00Regular priceUnit price / per -
A2/ Advanced OEE Excel Template - Powerful Manufacturing ...
4.87 / 5.0
(23) 23 total reviews
Regular price From €99,00Regular priceUnit price / per€99,00Sale price From €99,00 -
A1/ Template - Budget and project deliverables tracking -...
5.0 / 5.0
(3) 3 total reviews
Regular price From €29,00Regular priceUnit price / per€59,00Sale price From €29,00Sale -
A9/ Model - Project Risk Analysis - Google Sheet/Excel
2.0 / 5.0
(1) 1 total reviews
Regular price €39,00Regular priceUnit price / per€149,00Sale price €39,00Sale -
A3/ Model - Process FMEA - Google Sheet/Excel - Pro
4.0 / 5.0
(1) 1 total reviews
Regular price From €29,00Regular priceUnit price / per€59,00Sale price From €29,00Sale -
A5/ Model - Dasboard KPI Planning MS Project - Excel - Go...
Regular price From €49,00Regular priceUnit price / per -
A5/ Excel FMEA Template - Google Sheet/Excel - Basic
3.67 / 5.0
(3) 3 total reviews
Regular price €0,00Regular priceUnit price / per -
C2/ Model — OEE Dashboard - Production Tracking - Excel T...
4.0 / 5.0
(3) 3 total reviews
Regular price From €49,00Regular priceUnit price / per€99,00Sale price From €49,00Sale -
A6/ Template — Machine risk analysis — Google Sheet/Excel
Regular price €499,00Regular priceUnit price / per -
A8/ Model — Maintenance instructions - Example User Manua...
Regular price From €39,00Regular priceUnit price / per -
A4/ Model — Suppliers assessment — Google Sheet/Excel
5.0 / 5.0
(1) 1 total reviews
Regular price From €9,00Regular priceUnit price / per€29,00Sale price From €9,00Sale -
J6/ Model — Free Excel Production Monitoring File: Exampl...
3.0 / 5.0
(2) 2 total reviews
Regular price €0,00Regular priceUnit price / per -
J11/ PDF — TRS - Definition, calculation, benefits and im...
Regular price €0,00Regular priceUnit price / per -
J12/ PDF — Industry 5.0: Definition, technology, advantag...
Regular price €0,00Regular priceUnit price / per -
J13/ Maintenance Management Excel Model (CMMS)
5.0 / 5.0
(1) 1 total reviews
Regular price From €99,00Regular priceUnit price / per -
J29/ Power BI Model - TRS (Overall Earnings Ratio) Monito...
5.0 / 5.0
(1) 1 total reviews
Regular price From €0,00Regular priceUnit price / per -
J14/ 5S Excel Model: Checklist, Audit and Control for Ind...
Regular price €0,00Regular priceUnit price / per -
J15/ Advanced DMAIC Model for your Lean Six Sigma Project...
Regular price €0,00Regular priceUnit price / per
Any questions?

Contact form
blog posts
View all-

How to reduce the administrative costs of a com...
Introduction to Business Cost Reduction Reducing business costs is essential to maximizing profitability. Accounting, logistics, human resources: the tasks involved are essential, but also costly and time-consuming. However, it is...
How to reduce the administrative costs of a com...
Introduction to Business Cost Reduction Reducing business costs is essential to maximizing profitability. Accounting, logistics, human resources: the tasks involved are essential, but also costly and time-consuming. However, it is...
-

Improve your project management with the Kanban...
Introduction Businesses are facing unprecedented challenges when it comes to project management. Client expectations are rising, deadlines are shrinking, and project complexity is constantly increasing. Faced with these challenges, traditional...
Improve your project management with the Kanban...
Introduction Businesses are facing unprecedented challenges when it comes to project management. Client expectations are rising, deadlines are shrinking, and project complexity is constantly increasing. Faced with these challenges, traditional...
-

How to boost innovation?
Introduction Innovation is no longer a simple competitive advantage: in a context marked by the constant evolution of technologies and customer expectations, also with the acceleration towards industry 4.0 ,...
1 commentHow to boost innovation?
Introduction Innovation is no longer a simple competitive advantage: in a context marked by the constant evolution of technologies and customer expectations, also with the acceleration towards industry 4.0 ,...
1 comment


